
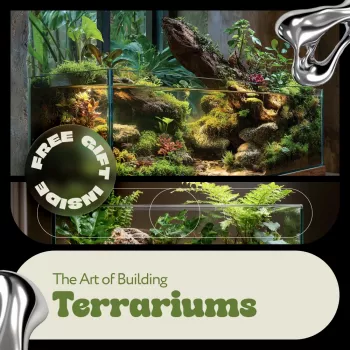
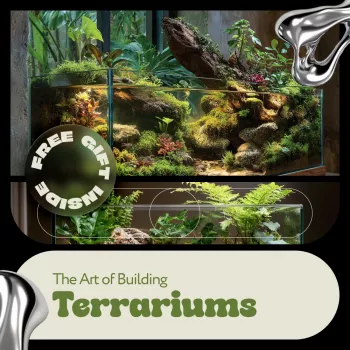
Terrariums are part décor, part slow hobby, and part little science experiment—without needing a greenhouse or a full afternoon. When a terrarium thrives, it’s because moisture, airflow, and light match the plants you chose (not because the jar looked cute on day one). Our team put together this practical, repeatable build approach so you can make a terrarium that stays clean, balanced, and easy to maintain—then add the creative touches that make it feel designed instead of random.
A terrarium succeeds when the environment inside the glass matches the plants you’re growing. The most common issues we see are simple: no drainage strategy, too much water, plants crammed too tightly, and placing the container in harsh direct sun (glass can turn into a heat trap fast).
Closed terrariums are best for humidity-lovers like many mosses and small ferns. They need restraint with watering because the water cycle recirculates. Open terrariums suit drier, brighter setups and evaporate faster, so they’re more forgiving if you accidentally mist a little extra.
If your goal is a long-lasting piece, start with forgiving species and scale the design to the container. A smaller, well-planned scene outlasts an overstuffed “big idea” forced into a jar.
Wash and dry your container. Make sure the opening allows you to plant and maintain without scraping the glass (maintenance friction is a real reason terrariums get neglected).
Create an even base of gravel/LECA. Deeper containers can handle a thicker drainage layer, which helps buffer small watering mistakes.
Add mesh or a thin separator to keep layers distinct. Charcoal can help with freshness in closed builds, but correct moisture control matters more than any additive.
Slope the soil higher in back to create depth. Leave space below the rim so condensation and smudges are less likely to become a constant annoyance.
Anchor stones and wood before plants so you don’t uproot everything later. Hardscape gives you focal points and a “terrain map” to plant into.
| Terrarium type | Best for | Watering rhythm | Placement | Common pitfall |
|---|---|---|---|---|
| Closed | Mosses, small ferns, humidity-loving mini plants | Very light, infrequent; watch condensation patterns | Bright, indirect light; stable room temperature | Overwatering (constant heavy condensation, soggy substrate) |
| Open | Drier setups, brighter spaces, faster airflow | Light but more frequent; allow surface to dry slightly | Bright light; some direct sun is okay if not overheating | Using moisture-loving plants that dry out quickly |
| Wide-mouth open bowl | Design-forward layouts and easier trimming | Moderate; easy access makes small adjustments simple | Tabletops with good ambient light | Overcrowding (plants touch and trap dampness) |
| Bottle/jar with narrow neck | Minimalist builds or moss-focused scenes | Conservative; hard to correct excess water | Steady indirect light, away from heaters | Difficult maintenance leading to neglect |
Light: Bright, indirect light is the sweet spot for most terrarium plants. Too little light slows growth and invites rot; too much can overheat the glass. For broader houseplant guidance, the Royal Horticultural Society (RHS) is a helpful reference point.
Watering: Use a mister or squeeze bottle for control. Add a little, then reassess the next day rather than flooding. If you want a solid baseline for traditional terrarium concepts and cautions, the Missouri Botanical Garden is an authoritative resource.
Neither is universally better: closed terrariums suit humidity-loving plants and require lighter watering, while open terrariums suit drier or brighter setups and are easier to correct if moisture goes off-balance.
Water based on what you observe (condensation patterns and substrate moisture) rather than a strict schedule, and start with small amounts. Closed terrariums typically need far less frequent watering than open terrariums.
Start with a drainage layer (gravel/LECA), then add a barrier layer, then substrate. This helps prevent roots from sitting in water and keeps your layers tidy over time.










Leave a comment