
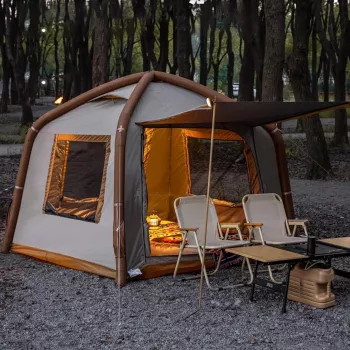
Camping gets easier when the shelter goes up quickly and stays dry when weather turns. An automatic inflatable tent with a built-in canopy combines fast pitching, sturdy air-beam support, and extra covered space for gear, cooking prep, or shade—without a pile of poles to sort. For weekend trips, festivals, and family campouts, that “set up fast, stay organized” advantage can make the whole campsite feel calmer from the moment you arrive.
“Automatic” in this category usually refers to how streamlined the structure is. Instead of feeding and locking multiple rigid poles, inflatable air beams form the tent’s main frame, so the tent takes shape as you pump it up.
Not all inflatable tents are built the same. If you camp where surprise showers, overnight dew, or gusty conditions are common, prioritize materials, seam construction, and anchoring options—not just capacity numbers.
| Feature | Why it matters | What to check |
|---|---|---|
| Waterproofing | Helps keep sleeping area dry in prolonged rain | Seam taping, coated fly, bathtub floor edges |
| Canopy/Awning | Adds shade and a dry entry zone | Tension points, coverage depth, pole/beam support if included |
| Setup speed | Less time exposed to weather and fewer parts | Clear inflation points, minimal pole pieces, labeled stakes |
| Wind handling | Prevents collapse or shifting overnight | Guyline attachment points, stake quality, beam thickness |
| Ventilation | Reduces condensation and heat buildup | Adjustable vents, mesh panels, rain-safe vent hoods |
| Space and comfort | Improves sleep and gear organization | Peak height, door size, vestibule/canopy clearance |
A fast-pitch tent is only “fast” when you follow a repeatable order. The goal is to square the footprint, inflate evenly, then lock everything down so rain runs off and wind can’t twist the structure.
Before heading out, check weather guidance and local advisories. For general storm awareness and lightning safety, review the NOAA National Weather Service safety resources. For campground-specific best practices, the National Park Service camping safety page is a solid reference.
Keeping the area tidy also helps minimize impact. If you’re brushing up on low-impact habits, see the Leave No Trace Center for Outdoor Ethics.
If quick pitching and weather coverage are priorities, the Automatic Inflatable Camping Tent with Canopy – Waterproof & Easy Setup is built around an inflatable support structure to reduce the time and complexity of traditional pole systems. The waterproof-oriented construction and included canopy create a practical covered area for entry, shade, and gear staging.
For trip organization and keeping small essentials on track, you can also pair your shelter with a planning tool like Creative Hobby Progress Tracker Ideas – Digital Ebook Guide, or add convenience to a car-camping setup with a touchless bin such as the 9L Smart Sensor Trash Can – Eco-Friendly, Touchless Waste Bin for Bathroom & Kitchen.
Many inflatable tents can be pitched in about 5–15 minutes once you’ve done it a couple times. Wind, tent size, and how carefully you stake and guy out the canopy can push that time longer, so pre-staging stakes and guylines helps.
They can be, especially when the fly fabric is coated, seams are taped, and the floor is bathtub-style. Proper tensioning, angling the canopy to shed water, using a correctly sized footprint, and keeping runoff paths clear are what make the difference in prolonged rain.
Most air-beam systems are repairable, and many punctures act like slow leaks rather than instant failures. Carrying a small repair kit and using guylines and good staking to reduce stress on the structure can prevent minor damage from becoming a trip-ending problem.











Leave a comment