Winter Training Guide: Layering, Gear, and Injury Safety
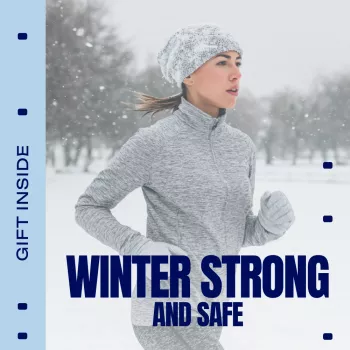
Winter Strong and Safe: Smart Layering, Gear Checks, and Injury Prevention for Cold-Weather Training
Cold weather changes how the body warms up, how sweat behaves, and how quickly small mistakes become big problems. A few predictable adjustments—layering with vents, planning for wind chill, protecting hands and feet, and warming up longer—can make outdoor runs, walks, hikes, and workouts feel controlled instead of stressful.
What Cold Weather Does to Performance and Safety
In winter, the body’s “comfort math” shifts. Skin temperature drops quickly, and wind plus wet conditions accelerate heat loss—often faster than expected once you stop at a crosswalk, hit a shaded stretch, or slow down on a hill. Wind chill can turn a manageable outing into a cold-management problem, so it’s worth checking a National Weather Service wind chill chart before heading out.
Breathing cold, dry air can irritate airways, especially when intensity spikes. Easing into pace and using a neck gaiter or face covering to warm incoming air can reduce that “burn” and keep breathing steadier. Cold also affects dexterity and reaction time—numb hands make it harder to handle zippers, phones, water bottles, and even balance corrections if you slip.
Most importantly, sweat management matters more in winter. Moisture trapped in fabric can chill you during pauses or a cooldown, so clothing choices need to account for both movement and the moments when you’re not moving.
Smart Layering That Adapts Mid-Workout
The most reliable winter strategy is to start slightly cool. Overdressing often feels great at the first minute, then turns into sweat-soaked layers that get colder as soon as pace drops or wind picks up. The goal is adjustable warmth: insulation you can keep when moving, plus fast ways to dump heat.
Build your system
- Base layer: Choose moisture-wicking fabric. Avoid cotton next to skin during active sessions because it holds moisture and increases chill.
- Mid layer: Add adjustable insulation (zip neck, light fleece, or grid knit) to trap warmth without bulky overheating.
- Outer layer: Use wind protection and light precipitation resistance, ideally with vents and zippers for quick temperature control.
- Adjustability checklist: Full-zip top, cuff control, and stashable hat/gloves make changing conditions easier.
- Plan for stops: If your route includes waiting (traffic lights), long downhills, or group regroups, bring a packable insulating layer so you don’t get cold during low-output minutes.
Layering Guide by Conditions (Adjust for Intensity and Wind)
| Conditions | Base Layer | Mid Layer | Outer Layer | Accessories |
|---|---|---|---|---|
| Cool (around 45–55°F / 7–13°C) | Light wicking tee/long sleeve | Optional light fleece | Light wind shell if breezy | Thin gloves optional; cap/headband |
| Cold (around 30–45°F / -1–7°C) | Wicking long sleeve | Light-to-mid insulation | Wind-resistant jacket | Gloves, beanie, neck gaiter |
| Very cold (below ~30°F / -1°C) | Thermal wicking base | Insulating mid layer | Windproof shell; consider water resistance | Warmer gloves/mitten shells, thicker socks, face cover |
Hands, Feet, and Face: The Comfort Multipliers
Winter comfort often comes down to small surface areas. When hands and feet get cold, the whole session can spiral—pace drops, posture tightens, and small stumbles become more likely.
Visibility and Route Planning When Days Are Short
Warm-Up, Pacing, and Injury Prevention in Winter
Cold-Weather Red Flags and When to Head Back
- Possible frostbite: numbness, tingling, pale or waxy skin. Rewarm promptly and end the session if it worsens. See CDC frostbite guidance.
- Possible hypothermia: uncontrollable shivering, confusion, slurred speech, clumsiness. Seek warm shelter and medical help if severe. Reference CDC hypothermia guidance.
- Wet + wind escalation: if clothes are soaked and wind increases, risk rises fast—prioritize shelter and dry layers.
- Quiet hazards: dehydration (cold blunts thirst), low blood sugar, and sudden weather shifts.
A Simple Pre-Run/Pre-Workout Winter Checklist
A Deeper, Step-by-Step System for Training Through Winter
When winter training feels inconsistent, it’s usually because one piece of the system is missing: a venting option, a stop-proof insulation plan, or a repeatable checklist that matches your typical routes and pace. For a more structured approach, Winter Strong and Safe: Cold Weather Workout Gear Safety eBook organizes layering combinations, gear checks, and winter-specific injury prevention into practical scenarios you can reuse.
For anyone who stays motivated by tracking consistency through the season, Creative Hobby Progress Tracker Ideas – Digital Ebook Guide can be adapted into a simple routine log for winter walks, runs, or strength sessions—especially helpful when conditions force indoor swaps.
FAQ
How should layering change when it’s windy but not extremely cold?
Wind can strip heat fast, so prioritize a wind-blocking outer layer with vents or a zipper, and keep insulation lighter underneath. A wicking base layer helps prevent sweat from turning into chill once you’re exposed on open sections.
What should be done if fingers or toes go numb during a workout?
Stop and rewarm early—add a shell mitten, thicker hat, or move to shelter, and avoid aggressively rubbing the area. If sensation doesn’t return promptly or skin looks pale/waxy, end the session and rewarm safely.
Is it better to start a winter run feeling warm or slightly cool?
Slightly cool is usually better because it reduces sweating and the cold “backfire” later. In very low temperatures, low-intensity workouts, or if you have health conditions that affect circulation, start warmer by upgrading accessories first (hat/gloves) rather than piling on heavy torso layers.










Leave a comment