
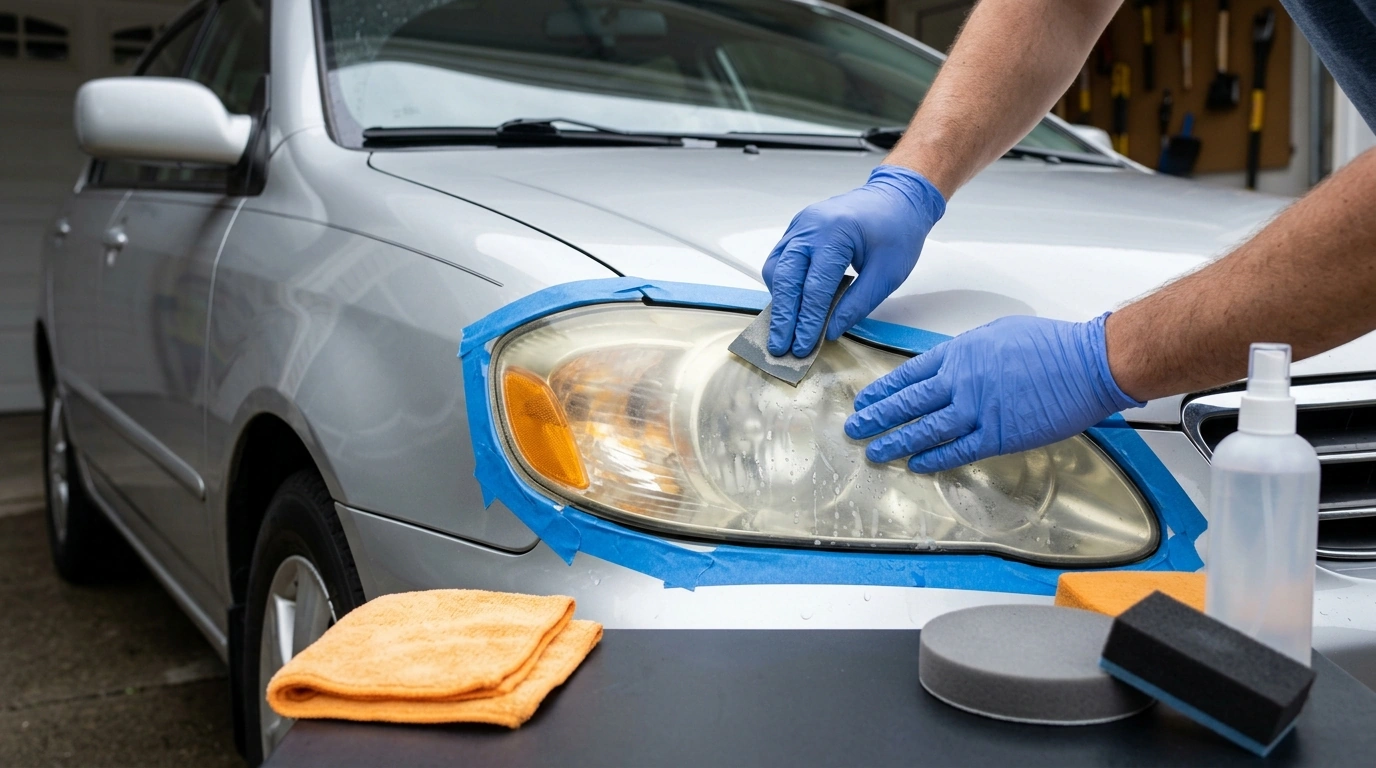
Cloudy, yellowed headlights can cut nighttime visibility and make a vehicle look tired even when the paint is clean. A lasting DIY restoration comes down to three things: safe prep, controlled abrasion (so you remove oxidation without digging deep scratches), and a protective UV finish so the clarity doesn’t fade again after a few washes. For more guidance, see How to Clean Headlights. From Cloudy to Clear..
Most modern headlight lenses are made from polycarbonate plastic, which is strong and impact-resistant but vulnerable to UV damage. From the factory, lenses typically have a UV-protective coating that slows down oxidation. For further reading, see Best Headlight Restoration Kits of 2026, Tested – Car and Driver.
Over time, sun exposure, road grit, winter salts, and harsh cleaners can break down that coating. Once the UV layer is compromised, the plastic oxidizes and turns hazy or yellow. That “fog” is usually on the outside surface—exactly what sanding and polishing can fix.
One quick check before you start: make sure the cloudiness is truly on the outside. Condensation, dust, or water intrusion inside the housing can mimic oxidation. If the haze is inside, sanding the exterior won’t solve the root cause; you’ll need to address housing seals or venting first.
Plan on working in the shade on a cool surface. Heat makes water evaporate faster during sanding and can leave streaks or dry spots that create uneven scratch patterns. Wear nitrile gloves and eye protection—sanding slurry and polish splatter are irritating and can be messy.
Mask carefully. Headlights are surrounded by paint, trim, and sometimes textured plastics that can scuff easily. Use painter’s tape around the entire perimeter and consider adding a second layer right at the edge if you’ll be sanding near the paint line.
| Item | Why it matters |
|---|---|
| Painter’s tape | Prevents accidental scuffs on paint and trim |
| Microfiber towels (2–4) | Reduces scratching and helps remove residue cleanly |
| Spray bottle with water + a drop of soap | Lubricates sanding to prevent deep gouges |
| Sandpaper/discs (600–3000 grit) or a restoration kit | Controls how much oxidation is removed |
| Plastic polish/compound | Restores clarity after sanding |
| UV sealant or clear coat made for headlights | Helps prevent quick re-yellowing |
Avoid household glass cleaners that contain ammonia. They’re not designed for polycarbonate and can also dry out nearby trim over time.
Use car shampoo or mild soap and water. Rinse well and dry completely so you’re judging the lens condition—not leftover grime or water spots.
Look at the lens from different angles. If you see moisture droplets, a foggy film behind the lens, or dirt inside the housing, exterior restoration won’t be a full fix. Address the housing seal or venting first.
Tape the perimeter and cover nearby panels with a towel. If the lens sits very close to painted edges, add a second tape layer as a “buffer zone.”
Pick the least aggressive grit that will still remove oxidation efficiently. Deep yellowing and heavy oxidation often need 600–800 grit to start. Light haze may be better served by starting at 1000–1500 grit to minimize material removal.
Keep the surface wet at all times with your soapy water spray. Sand in one direction (for example, horizontal). Wipe frequently to check your progress. The goal is even removal—no “clean spots” next to untouched yellow patches.
Use a plastic compound with a foam pad or microfiber towel. Work in small sections and keep pressure consistent. If you prefer machine assistance, a compact rotary tool can speed up polishing when used carefully at controlled speeds—an option is the Professional 45000RPM Electric Nail Drill Machine with USB Charging paired with an appropriate foam pad (avoid excessive heat and stay off the paint).
| Method | Best for | Typical longevity | Main drawback |
|---|---|---|---|
| Soap + polish only | Very light haze | Weeks to a few months | Doesn’t remove heavy oxidation |
| Wet sanding + polish + UV sealant | Most cloudy/yellow lenses | Months to 1–2 years (varies) | Takes time and careful steps |
| Clear coat made for headlights | Maximum durability when done right | Often longer than sealant | Higher risk of runs/uneven finish |
A simple checklist makes it easier to track your grit progression, avoid skipped steps, and remember cure times for UV protection. For a ready-to-use format that’s easy to follow in the driveway, use the Headlight Rescue Checklist (digital guide).
Longevity depends heavily on UV protection and sun exposure. Sanding and polishing without a UV sealant often fades quickly, while a dedicated UV coating or headlight clear coat typically lasts much longer.
It can provide short-term improvement for very light haze, but it’s not a durable restoration method. It usually doesn’t add UV protection, so the cloudiness often returns.
If the lens is cracked, severely pitted, or the hazing is inside the housing from moisture or damage, restoration results may be limited. In those cases, repair of seals/venting or full replacement can be the better route.










Leave a comment